MRIを読む (4) Macでもデバッグしたい
マシンが非力なので仮想マシン上では動作が重たい。 Mac上でデバッグする方法を覚える。
Homebrewでいれたrbenv + ruby-buildをつかって2.1.4をインストールしている状態。
どのコンパイラが使われたのか
clangである。なのでclangのデバッガを使ってソースを追う。
$ ruby -r rbconfig -e 'puts RbConfig::CONFIG["CC"]'
clang
デバッガ(lldb)でrubyを実行
lldbでrubyのデバッグ初級編 - CubicLouve
この方のブログ、よくあたる。
同じような感じで実行してみる
$ lldb `rbenv which ruby`
(lldb) target create "/usr/local/var/rbenv/versions/2.1.4/bin/ruby"
Current executable set to '/usr/local/var/rbenv/versions/2.1.4/bin/ruby' (x86_64).
(lldb) b rb_io_puts                                                                                                                                                                              Breakpoint 1: where = ruby`rb_io_puts, address = 0x0000000100070750
(lldb) r -e 'puts :hi'
Process 87570 launched: '/usr/local/var/rbenv/versions/2.1.4/bin/ruby' (x86_64)
Process 87570 stopped
* thread #1: tid = 0x1ad973, 0x0000000100070750 ruby`rb_io_puts, queue = 'com.apple.main-thread', stop reason = breakpoint 1.1
    frame #0: 0x0000000100070750 ruby`rb_io_puts
ruby`rb_io_puts:
-> 0x100070750:  pushq  %rbp
   0x100070751:  movq   %rsp, %rbp
   0x100070754:  pushq  %r15
   0x100070756:  pushq  %r14
(lldb) bt
* thread #1: tid = 0x1ad973, 0x0000000100070750 ruby`rb_io_puts, queue = 'com.apple.main-thread', stop reason = breakpoint 1.1
  * frame #0: 0x0000000100070750 ruby`rb_io_puts
    frame #1: 0x00000001001880b0 ruby`vm_call0_body + 2320
    frame #2: 0x000000010017943f ruby`rb_funcallv + 207
    frame #3: 0x000000010018a9d7 ruby`vm_call_cfunc + 1063
    frame #4: 0x000000010018a322 ruby`vm_call_method + 866
    frame #5: 0x0000000100171aad ruby`vm_exec_core + 11933
    frame #6: 0x00000001001804a1 ruby`vm_exec + 129
    frame #7: 0x000000010018142c ruby`rb_iseq_eval_main + 396
    frame #8: 0x0000000100046744 ruby`ruby_exec_internal + 148
    frame #9: 0x000000010004666e ruby`ruby_run_node + 78
    frame #10: 0x000000010000143f ruby`main + 79
    frame #11: 0x00007fff8e1045fd libdyld.dylib`start + 1
    frame #12: 0x00007fff8e1045fd libdyld.dylib`start + 1
これでは読めないのでは。
ビルドし直す
man clangすると
-g Generate debug information. Note that Clang debug information works best at -O0.
とあるので、この通りにビルドする。既存の設定を確認する。
$ ruby -r rbconfig -e 'puts RbConfig::CONFIG["CFLAGS"]'
-O3 -Wno-error=shorten-64-to-32 -pipe
-gと-O0を渡したがソースコードが表示されない。StackOverflowの以下の記事を参考にrbenv installに-kオプションを渡す。
ruby - How do I get rbenv to keep debugging symbols? - Stack Overflow
実行
$ RUBY_CFLAGS='-g -O0' RUBY_CONFIGURE_OPTS="--with-readline-dir=/usr/local/opt/readline --with-openssl-dir=/usr/local/opt/openssl" rbenv install 2.1.4 -k
もう一度
でたね。
$ lldb `rbenv which ruby`
(lldb) target create "/usr/local/var/rbenv/versions/2.1.4/bin/ruby"
Current executable set to '/usr/local/var/rbenv/versions/2.1.4/bin/ruby' (x86_64).
(lldb) b rb_io_puts
Breakpoint 1: where = ruby`rb_io_puts + 19 at io.c:6989, address = 0x00000001000a53f3
(lldb) r -e 'puts :hi'
Process 96042 launched: '/usr/local/var/rbenv/versions/2.1.4/bin/ruby' (x86_64)
Process 96042 stopped
* thread #1: tid = 0x23767f, 0x00000001000a53f3 ruby`rb_io_puts(argc=1, argv=0x0000000102000028, out=4321012640) + 19 at io.c:6989, queue = 'com.apple.main-thread', stop reason = breakpoint 1.1
    frame #0: 0x00000001000a53f3 ruby`rb_io_puts(argc=1, argv=0x0000000102000028, out=4321012640) + 19 at io.c:6989
   6986     VALUE line;
   6987
   6988     /* if no argument given, print newline. */
-> 6989      if (argc == 0) {
   6990     rb_io_write(out, rb_default_rs);
   6991     return Qnil;
   6992     }
(lldb)
実行中のプロセスにアタッチする
前回と同じように実行中のプロセスにアタッチする
$ ruby -e 'loop { puts :hi; sleep 5 }' > /dev/null &
[1] 5396
$ lldb `rbenv which ruby`
(lldb) target create "/usr/local/var/rbenv/versions/2.1.4/bin/ruby"
Current executable set to '/usr/local/var/rbenv/versions/2.1.4/bin/ruby' (x86_64).
(lldb) b rb_io_puts                                                                                                                       Breakpoint 1: where = ruby`rb_io_puts + 19 at io.c:6989, address = 0x00000001000a53f3
(lldb) process attach -p 5396
Process 5396 stopped
(lldb) process continue
Process 5396 resuming
Process 5396 stopped
* thread #1: tid = 0x23fbba, 0x00000001078a63f3 ruby`rb_io_puts(argc=1, argv=0x0000000107c38050, out=140508413144000) + 19 at io.c:6989, queue = 'com.apple.main-thread', stop reason = breakpoint 1.1
    frame #0: 0x00000001078a63f3 ruby`rb_io_puts(argc=1, argv=0x0000000107c38050, out=140508413144000) + 19 at io.c:6989
   6986     VALUE line;
   6987
   6988     /* if no argument given, print newline. */
-> 6989     if (argc == 0) {
   6990     rb_io_write(out, rb_default_rs);
   6991     return Qnil;
   6992     }
アタッチできたようだ。
lldbの使い方についてはまた必要になったとき調べる。
実行中のプロセスのcoreをとる
(lldb) process save-core /tmp/core
とれたコアは
$ lldb `rbenv which ruby` -c /tmp/core
のような感じで実行できる。
putsの引数の:hiをCから引きたかったけど
(lldb) p rb_sym_to_s(argv[0])
(lldb) expr rb_sym_to_s(argv[0])
などでうまく見れない。rb_define_methodしたメソッドを引く方法を調べたほうがよさそうだ。
まとめ
ruby -r rbconfig -e 'puts RbConfig::CONFIG["CC"], RbConfig::CONFIG["CFLAGS"]'でビルド時のオプションを確認できるclangでコンパイルしたrubyをデバッグするときはllvmを使うrbenvを使っている場合RUBY_CFLAGSでビルド時のコンパイルオプションを指定できるrbenv install X -kの-kオプションでソースコードを取っておかないとデバッグ時にソースコードが表示できないlldbでrubyを実行する方法、実行中のrubyプロセスにアタッチする方法がわかったlldbで実行中のプロセスのコアを取る方法がわかった
インしたお! マイクラ開始即通知、idobata + fluentd
やりたいこと
TL;DR
Minecraftサーバーにfluentdをいれて以下のような設定ファイルでログイン/ログアウト通知を実装した。
<source>
  type tail
  path /home/blockgiven/minecraft/logs/latest.log
  format /^\[(?<time>.*)\]\s\[(?<caused_at>[^/]*)/(?<level>.*)\]:\s(?<log>.*)$/
  time_format %H:%M:%S
  tag minecraft.log
  pos_file /home/blockgiven/fluent/pos/minecraft.pos
</source>
<match minecraft.log.talk>
  type record_reformer
  tag reformed.${tag}
  player ${log.match(/^<(?<player>.*)>\s.*$/)[:player]}
  message ${log.match(/^<(?<player>.*)>\s(?<message>.*)$/)[:message]}
</match>
<match minecraft.log.join>
  type record_reformer
  tag reformed.${tag}
  player ${log.match(/^(?<player>.*)\sjoined\sthe\sgame$/)[:player]}
</match>
<match minecraft.log.left>
  type record_reformer
  tag reformed.${tag}
  player ${log.match(/^(?<player>.*)\sleft\sthe\sgame$/)[:player]}
</match>
<match minecraft.log>
  type rewrite_tag_filter
  rewriterule1 log ^\<.*\>\s.*$ minecraft.log.talk
  rewriterule2 log ^.*\sjoined\sthe\sgame$ minecraft.log.join
  rewriterule3 log ^.*\sleft\sthe\sgame$ minecraft.log.left
</match>
<match debug.**>
  type stdout
</match>
<match reformed.minecraft.log.join>
  type copy
  <store>
    type idobata
    webhook_url https://idobata.io/hook/generic/xxxxxxxx-xxxx-xxxx-xxxx-xxxxxxxxxxxx
    message_template @all <%= record['player'] %>がマイクラはじめたみたい
  </store>
</match>
<match reformed.minecraft.log.left>
  type copy
  <store>
    type idobata
    webhook_url https://idobata.io/hook/generic/xxxxxxxx-xxxx-xxxx-xxxx-xxxxxxxxxxxx
    message_template @all <%= record['player'] %>がマイクラおわったみたい
  </store>
</match>
今まで
定期的に外部からMinecraftサーバーに接続し、ログインを検知するプログラムを、Heroku上で実行していた。
blockgiven/minecraft_logged_in_notifier
このプログラムの利点は、Minecraftサーバーのログファイルを見る権利がなくても、サーバーのIPアドレス/ポート番号さえわかれば動くこと。 今回、サーバーへのアクセス権をゲットしたので、ログファイルを監視する方式に切り替えたい。
Fluentdを導入する
aptで導入
debパッケージからFluentdをインストールする | Fluentdを参考に導入する。
$ sudo apt-get install -y curl
$ curl -L http://toolbelt.treasuredata.com/sh/install-debian-wheezy-td-agent2.sh | sh
う、ログファイルは見れるがsudo権限がなかった。つらい。
gemで導入
幸いgemをいれる権限はある。Ruby GemからFluentdをインストールする | Fluentdを参考にgemとして導入する。
$ gem install fluentd --no-ri --no-rdoc
$ fluentd --setup ./fluent
Minecraftのログからイベントを収集する
設定ファイルはminecraftのログをIRCに流すfluentdのコンフィグを参考にする
<source>
  type tail
  path /home/blockgiven/minecraft/logs/latest.log
  format /^\[(?<time>.*)\]\s\[(?<caused_at>[^/]*)/(?<level>.*)\]:\s(?<log>.*)$/
  time_format %H:%M:%S
  tag debug.minecraft.log
  pos_file /home/blockgiven/fluent/pos/minecraft.pos
</source>
<match debug.**>
  type stdout
</match>
debug.〜でタグ付けするとstdoutに出て便利。
起動は
$ fluentd -c ./fluent/fluent.conf -vv &
設定ファイルの再読み込みはSIGHUPを送る。
pidファイルを作る設定後で確認したい。
$ ps aux | grep fluentd
$ kill -HUP 19955
マインクラフトでログインしてログアウトしログを確認する
2014-11-08 10:37:00 +0900 debug.minecraft.log: {"caused_at":"User Authenticator #9","level":"INFO","log":"UUID of player blockgiven is xxxxxxxx-xxxx-xxxx-xxxx-xxxxxxxxxxxx"}
2014-11-08 10:37:00 +0900 debug.minecraft.log: {"caused_at":"Server thread","level":"INFO","log":"blockgiven[/xxx.xxx.xxx.xxx:xxxxx] logged in with entity id 625953 at (241.04323755057334, 70.0, 124.74428504286337)"}
2014-11-08 10:37:00 +0900 debug.minecraft.log: {"caused_at":"Server thread","level":"INFO","log":"blockgiven joined the game"}
2014-11-08 10:37:11 +0900 debug.minecraft.log: {"caused_at":"Server thread","level":"INFO","log":"blockgiven lost connection: TextComponent{text='Disconnected', siblings=[], style=Style{hasParent=false, color=null, bold=null, italic=null, underlined=null, obfuscated=null, clickEvent=null, hoverEvent=null, insertion=null}}"}
2014-11-08 10:37:11 +0900 debug.minecraft.log: {"caused_at":"Server thread","level":"INFO","log":"blockgiven left the game"}
収集できてる。
次はrewriteの設定をして、ログイン/ログアウト/チャットのログを振り分ける。 rewrite tag filterのプラグインを入れる。
$ gem install fluent-plugin-rewrite-tag-filter
設定を追加する。
<source>
  type tail
  path /home/blockgiven/minecraft/logs/latest.log
  format /^\[(?<time>.*)\]\s\[(?<caused_at>[^/]*)/(?<level>.*)\]:\s(?<log>.*)$/
  time_format %H:%M:%S
  tag minecraft.log
  pos_file /home/blockgiven/fluent/pos/minecraft.pos
</source>
<match minecraft.log>
  type rewrite_tag_filter
  rewriterule1 log ^\<.*\>\s.*$ minecraft.log.talk
  rewriterule2 log ^.*\sjoined\sthe\sgame$ minecraft.log.join
  rewriterule3 log ^.*\sleft\sthe\sgame$ minecraft.log.left
</match>
# rewrite tag filterをいれたので、設定が終わるまで`minecraft.*`を`debug.minecraft.*`にリダイレクト
<match minecraft.log.**>
  type rewrite_tag_filter
  rewriterule1 log . debug.${tag}
</match>
<match debug.**>
  type stdout
</match>
再度読み込んでみる
$ ps aux | grep fluentd
$ kill -HUP 19955
うまくいったようだ
2014-11-08 11:11:02 +0900 debug.minecraft.log.join: {"caused_at":"Server thread","level":"INFO","log":"blockgiven joined the game"}
2014-11-08 11:11:09 +0900 debug.minecraft.log.talk: {"caused_at":"Server thread","level":"INFO","log":"<blockgiven> a"}
2014-11-08 11:11:12 +0900 debug.minecraft.log.left: {"caused_at":"Server thread","level":"INFO","log":"blockgiven left the game"}
誰が出た/入ったのかも切り取りたい。
$ gem install fluent-plugin-record-reformer
debug.をつけるrewriteの設定の前に追加
<match minecraft.log.talk>
  type record_reformer
  tag reformed.${tag}

  player  ${log.match(/^<(?<player>.*)>\s(?<message>.*)$/)[:player]}
  message ${log.match(/^<(?<player>.*)>\s(?<message>.*)$/)[:message]}
</match>
<match minecraft.log.join>
  type record_reformer
  tag reformed.${tag}

  player ${log.match(/^(?<player>.*)\sjoined\sthe\sgame$/)[:player]}
</match>
<match minecraft.log.left>
  type record_reformer
  tag reformed.${tag}

  player ${log.match(/^(?<player>.*)\sleft\sthe\sgame$/)[:player]}
</match>
デバッグの書き換えの後ろにもつけてやる。
<match reformed.minecraft.log.**>
  type rewrite_tag_filter
  rewriterule1 log . debug.${tag}
</match>
うまく動いているようだ
2014-11-08 11:53:59 +0900 debug.reformed.minecraft.log.join: {"caused_at":"Server thread","level":"INFO","log":"blockgiven joined the game","player":"blockgiven"}
2014-11-08 11:54:06 +0900 debug.reformed.minecraft.log.talk: {"caused_at":"Server thread","level":"INFO","log":"<blockgiven> hi","player":"blockgiven","message":"hi"}
2014-11-08 11:54:08 +0900 debug.reformed.minecraft.log.left: {"caused_at":"Server thread","level":"INFO","log":"blockgiven left the game","player":"blockgiven"}
通知する
今回はidobata.ioになげたい。
$ gem install fluent-plugin-idobata
<match reformed.minecraft.log.join>
  type copy
  <store>
    type idobata
    webhook_url          https://idobata.io/hook/generic/xxxxxxxx-xxxx-xxxx-xxxx-xxxxxxxxxxxx
    message_template     @all <%= record['player'] %>がマイクラはじめたみたい
  </store>
</match>
<match reformed.minecraft.log.left>
  type copy
  <store>
    type idobata
    webhook_url          https://idobata.io/hook/generic/xxxxxxxx-xxxx-xxxx-xxxx-xxxxxxxxxxxx
    message_template     @all <%= record['player'] %>がマイクラおわったみたい
  </store>
</match>
はまったところ
reformで書き換えて同じkeyにdestすると無限ループで死ぬ。
まとめ
マイクラにログイン/ログアウトすると即座にidobata.ioに通知されるようになった。 これまで以上にマイクラをやる頻度があがりそう。
fluentdとidobata.io超便利。
次
- 今回は設定を1ファイルにべた書きした。分割方法を調べたい。
- ログファイルを見れない場合も監視できるようにする
- MinecraftにRubotyを住ませる
MRIを読む (3) デバッグ方法の入り口を覚える
gdbを試したい
gdbがない
$ gdb rubies/bin/ruby-2.1.4
The program 'gdb' can be found in the following packages:
 * gdb
 * gdb-minimal
Ask your administrator to install one of them
gdbを入れる
apt-get install -y gdb
gdbで止める
putsしたところを止める。
$ gdb rubies/bin/ruby-2.1.4
GNU gdb (Ubuntu 7.7.1-0ubuntu5~14.04.2) 7.7.1
Copyright (C) 2014 Free Software Foundation, Inc.
License GPLv3+: GNU GPL version 3 or later <http://gnu.org/licenses/gpl.html>
This is free software: you are free to change and redistribute it.
There is NO WARRANTY, to the extent permitted by law.  Type "show copying"
and "show warranty" for details.
This GDB was configured as "x86_64-linux-gnu".
Type "show configuration" for configuration details.
For bug reporting instructions, please see:
<http://www.gnu.org/software/gdb/bugs/>.
Find the GDB manual and other documentation resources online at:
<http://www.gnu.org/software/gdb/documentation/>.
For help, type "help".
Type "apropos word" to search for commands related to "word"...
Reading symbols from rubies/bin/ruby-2.1.4...done.
(gdb) b rb_io_puts
Breakpoint 1 at 0x51970: rb_io_puts. (2 locations)
(gdb) r -e 'puts :hi'
Starting program: /home/vagrant/rubies/bin/ruby-2.1.4 -e 'puts :hi'
[Thread debugging using libthread_db enabled]
Using host libthread_db library "/lib/x86_64-linux-gnu/libthread_db.so.1".
[New Thread 0x7ffff7ff7700 (LWP 2593)]

Breakpoint 1, rb_io_puts (argc=1, argv=0x7ffff7eec038, out=93824997809280) at io.c:6984
6984    {
(gdb) l
6979     *     test
6980     */
6981
6982    VALUE
6983    rb_io_puts(int argc, VALUE *argv, VALUE out)
6984    {
6985        int i;
6986        VALUE line;
6987
6988        /* if no argument given, print newline. */
(gdb)
gdbでいろいろできそう。 gdbの使い方を覚えねば。 rubyの値を表示してくれるようなマクロを探したい。
coreを取ってみる
実行中のプロセスにコアをダンプする。
$ rubies/bin/ruby-2.1.4 -e 'loop { p :hi; sleep 5 }' &
$ gcore 2081 # ここは適宜読み替えてください
とっただけではどうしようもない
gdbrubyを使ってバックトレースを見る
CoreからRubyのバックトレースを表示するgdbruby.rbを作った
を参考に表示させてみる
$ rubies/bin/gem-2.1.4 install gdbruby
$ rubies/bin/gdbruby.rb core.2081  rubies/bin/ruby-2.1.4

environ:
XDG_SESSION_ID=2
TERM=xterm-256color
SHELL=/bin/bash
SSH_CLIENT=10.0.2.2 54405 22
SSH_TTY=/dev/pts/0
USER=vagrant
LS_COLORS=rs=0:di=01;34:ln=01;36:mh=00:pi=40;33:so=01;35:do=01;35:bd=40;33;01:cd=40;33;01:or=40;31;01:su=37;41:sg=30;43:ca=30;41:tw=30;42:ow=34;42:st=37;44:ex=01;32:*.tar=01;31:*.tgz=01;31:*.arj=01;31
MAIL=/var/mail/vagrant
PATH=/usr/local/sbin:/usr/local/bin:/usr/sbin:/usr/bin:/sbin:/bin:/usr/games:/usr/local/games
PWD=/home/vagrant
LANG=en_US.UTF-8
SHLVL=1
HOME=/home/vagrant
LOGNAME=vagrant
SSH_CONNECTION=10.0.2.2 54405 10.0.2.15 22
LC_CTYPE=ja_JP.UTF-8
LESSOPEN=| /usr/bin/lesspipe %s
XDG_RUNTIME_DIR=/run/user/1000
LESSCLOSE=/usr/bin/lesspipe %s %s
_=rubies/bin/ruby-2.1.4

ruby_version:
"2.1.4"

c_backtrace:
#0  pthread_cond_timedwait@@GLIBC_2.3.2 () at ../nptl/sysdeps/unix/sysv/linux/x86_64/pthread_cond_timedwait.S:238
#1  0x00007fd6eb996e6f in native_cond_timedwait (ts=<optimized out>, mutex=<optimized out>, cond=<optimized out>) at thread_pthread.c:352
#2  native_sleep (th=0x7fd6edcc95f0, timeout_tv=0x7fff40dffe10) at thread_pthread.c:1061
#3  0x00007fd6eb99877b in sleep_timeval (th=0x7fd6edcc95f0, tv=..., spurious_check=1) at thread.c:1049
#4  0x00007fd6eb99bf35 in rb_thread_wait_for (time=...) at thread.c:1118
#5  0x00007fd6eb8aeb70 in rb_f_sleep (argc=1, argv=0x7fd6eb6f2060) at process.c:4230
#6  0x00007fd6eb975174 in vm_call_cfunc_with_frame (ci=<optimized out>, reg_cfp=0x7fd6eb7f1ed0, th=0x7fd6edcc95f0) at vm_insnhelper.c:1489
#7  vm_call_cfunc (th=0x7fd6edcc95f0, reg_cfp=0x7fd6eb7f1ed0, ci=<optimized out>) at vm_insnhelper.c:1579
#8  0x00007fd6eb979f24 in vm_exec_core (th=th@entry=0x7fd6edcc95f0, initial=initial@entry=0) at insns.def:1028
#9  0x00007fd6eb97db8f in vm_exec (th=th@entry=0x7fd6edcc95f0) at vm.c:1398
#10 0x00007fd6eb9810da in invoke_block_from_c (th=0x7fd6edcc95f0, block=<optimized out>, self=<optimized out>, argc=argc@entry=0, argv=argv@entry=0x0, blockptr=blockptr@entry=0x0, cref=cref@entry=0x0, defined_class=8) at vm.c:817
#11 0x00007fd6eb981d44 in vm_yield (argc=0, argv=0x0, th=<optimized out>) at vm.c:856
#12 rb_yield_0 (argv=0x0, argc=0) at vm_eval.c:938
#13 loop_i () at vm_eval.c:1008
#14 0x00007fd6eb829b0e in rb_rescue2 (b_proc=b_proc@entry=0x7fd6eb981cf0 <loop_i>, data1=data1@entry=0, r_proc=r_proc@entry=0x0, data2=data2@entry=0) at eval.c:754
#15 0x00007fd6eb973a3e in rb_f_loop (self=140561089356800) at vm_eval.c:1042
#16 0x00007fd6eb9839a1 in vm_call_cfunc_with_frame (ci=<optimized out>, reg_cfp=0x7fd6eb7f1f70, th=0x7fd6edcc95f0) at vm_insnhelper.c:1489
#17 vm_call_cfunc (ci=<optimized out>, reg_cfp=0x7fd6eb7f1f70, th=0x7fd6edcc95f0) at vm_insnhelper.c:1579
#18 vm_call_method (th=0x7fd6edcc95f0, cfp=0x7fd6eb7f1f70, ci=<optimized out>) at vm_insnhelper.c:1767
#19 0x00007fd6eb97a865 in vm_exec_core (th=th@entry=0x7fd6edcc95f0, initial=initial@entry=0) at insns.def:999
#20 0x00007fd6eb97db8f in vm_exec (th=th@entry=0x7fd6edcc95f0) at vm.c:1398
#21 0x00007fd6eb989996 in rb_iseq_eval_main (iseqval=iseqval@entry=140561093547920) at vm.c:1662
#22 0x00007fd6eb825a8f in ruby_exec_internal (n=0x7fd6ee0cd790) at eval.c:253
#23 0x00007fd6eb8293ad in ruby_exec_node (n=0x7fd6ee0cd790) at eval.c:318
#24 ruby_run_node (n=<optimized out>) at eval.c:310
#25 0x00007fd6eb82566b in main (argc=3, argv=0x7fff40e00ff8) at main.c:36

ruby_backtrace:
[4] sleep() <- -e:1
[3] block in <main>() <- -e:1
[2] loop() <- -e:1
[1] <main>() <- -e:1
バックトレースが出た。
デバッグシンボルを調べる。
rubyをビルドしたときのconfigureオプションを表示する - Qiitaのコマンドを打ってgccに-gオプション渡しているか確認してみた。
最初から入ってるシステムのrubyだとついてる。
$ rubies/bin/ruby-2.1.4 -r rbconfig -e 'puts RbConfig::CONFIG["configure_args"]'
 '--prefix=/home/vagrant/rubies' '--program-suffix=-2.1.4'
あれ、ないけどデバッグシンボルついてるのかな。
coreを取ってみる2
man coreすると、コアダンプするシグナルはsignal(7)にあると書かれているので、man 7 signalで見る。
SIGQUITやSIGABRTもcoreを吐くとあったので試しにkill -3 PIDやkill -ABRT PIDなどで殺してみるが、コアを吐かない。
Ubuntu 12.10 で core ファイルが作成されない - @tmtms のメモ
のようなブログを見つけたのでulimit -aで確認(coreだけ見るならulimit -cでとれるとman bashに書いてあった)すると、0に設定されている。
もう一度man coreをよく見ると、コアファイルが作成されない状況について、ulimitにもしっかり触れられていた。
上限を引き上げる。
$ ulimit -c 100000
もういちどABRTしてみると、しっかりコアはいてくれた。
まとめ
gdbでrubyのc関数の中で止まる方法を覚えたgcoreで実行中のRubyプロセスのコアをダンプする方法を覚えたkillでコアをダンプするシグナルを送り、コアをダンプする方法を覚えたcoreがでない状況について調べる方法を覚えた
実際に使いこなすためには
実例で学べないので難しそう。Rubyじゃなくてもいいので実例で学ぶ方法を探したい。
試したい
ここで紹介されているツールを試してみたい。
Ruby プロセスを追いかけるツール9選 - sonots:blog
つぎ
環境構築や、読む下準備ばかりしているので明日こそMRIを読みはじめるぞ。
MRIを読む (2) 環境構築: Rubyをビルドする
Rubyを読むためには、実際にRubyを動かして試せた方が便利です。 また、ソースコードに手を加えたり、デバッガで止めるのをCの世界(Rubyより下の世界)でやるために、Rubyを自分でビルド出来た方が捗ります。
ソースコードを入手
Rubyは更新が早いです。trunkを追いかけたい場合もあるので、常に最新のソースコードを入手したいです。
リポジトリガイドによると、svnで開発されていますが、Gitを使っている人はGitHubのruby/rubyから入手することも可能なようです。
Ubuntu TrustyにはデフォルトでGitは入っていません。
$ git
The program 'git' is currently not installed. To run 'git' please ask your administrator to install the package 'git'
provisioningのシェルスクリプトに以下を追記します。(sudoつけて手動実行でも可)
apt-get update
apt-get install -y git
ビルドに必要なライブラリを整える
ruby-buildのSuggested build environmentに記載されているものを一通り入れます。
apt-get install -y autoconf bison build-essential libssl-dev libyaml-dev libreadline6-dev zlib1g-dev libncurses5-dev
ビルドする
rubyビルドガイドを参考にする
まずはvagrantでたてたマシンに接続
$ vagrant ssh
自分でビルドしたrubyは、$HOME/rubies以下にインストールしようと思う。
$ mkdir rubies
Rubyのディレクトリへ移動
$ cd ruby
この記事を執筆時点で最新のRubyをビルドするためv2_1_4をcheckoutする
$ git checkout v2_1_4
cloneしてきたばかりだとconfigureがないので、autoconfでconfigureを作成する。
$ autoconf
configureを実行する際に、prefixを指定し、/home/vagrant/rubies以下にインストールするするようにする。また、ruby-2.1.4のような実行ファイルを作るためprogram-suffixオプションも指定する。
$ ./configure --prefix=/home/vagrant/rubies --program-suffix=-2.1.4
つくるぞ。
$ make
チェックしとく
$ make check
通ったら
make install
とりあえずRubyがビルドできた。
確認してみよう
$ cd
$ rubies/bin/ruby-2.1.4 -e 'puts RUBY_VERSION'
2.1.4
動いている。
基本的なビルドの仕方を学んだので次はデバッグ方法を調べる。
MRIを読む (1) 環境構築: Linuxを入れる
MRIを読みたいので環境を整える。
普段はMac OSを使っている。 Mac OS上にMRIを読む環境を整えてもよいのだが、いろいろと壊す可能性もあるので、VMでLinuxをたてて読むことにする。
Vagrant + VirtualBoxを入れる
$ brew cask install vagrant virtualbox
マシンを起動しSSHで接続
なるべく新しめのOS上でソースを読みたい。今回はubuntu/trusty64をベースにする。
boxはDiscover Featured Vagrant Boxesで検索した。
$ vagrant init ubuntu/trusty64
$ vagrant up
$ vagrant ssh
localeを整える
ローカルの環境ではja_JP.UTF-8だからかvagrant sshすると警告が出た。locale-genで生成する。
Vagrantでは、シェルスクリプトによるプロビジョニングが可能なので、それを活用する。
Vagrantfileに次のような行を追記
config.vm.provision :shell, path: 'vagrant-bootstrap.sh'
vagrant-bootstrap.shにシェルスクリプトを書いていく。
#!/bin/sh
if [ -z $(locale -a | grep ja_JP.utf8) ]; then
  locale-gen ja_JP.utf8
fi
書き終わったら次のように、プロビジョニングを実行する。
$ vagrant reload --provision
まとめ
MacでもhomebrewとVagrantを使って簡単にLinuxの実行環境を手に入れることができた。 次はMRIをビルドします。
MRIを読む
Ruboty plugin per dayの取り組みに区切りを付けたので新しいことをはじめる。毎日少しずつ読み進めたい。 この記事はまとめ記事にし、新しい記事を追加した際に更新していきたい。
阿吽の呼吸でChatOps、標準入力と標準出力でハンドラがつくれるruboty-aunをつくった
標準入力にチャットの発言をすっと入れる。標準出力をふっと出せばハンドラーの出来上がり。Rubyでハンドラー書かなくてもいい。

使い方
Gemfileに以下を書いてbundle install
gem 'ruboty-aun'
Rubotyと同じディレクトリの下にaunを作って、その中に実行ファイルを置く。例えば、こんな感じ。
$ mkdir aun
$ cat > aun/aun
#!/usr/bin/env php
<?php
$body = trim(fgets(STDIN));
if ($body == 'あ') {
  fwrite(STDOUT, 'うん');
}
$ chmod u+x aun/aun
アイデア
チャットの Bot 書くのに CoffeeScript とか Ruby とか書くのダルいし標準入力から標準出力返すだけでハンドラ実装できるフレームワークあればいいんじゃないかと思った。Golang で週末あたりやるか。
— Yuya Takeyama (@yuya_takeyama) 2014, 10月 23なぜ阿吽
阿は口を開いて最初に出す音、吽は口を閉じて出す最後の音であり、そこから、それぞれ宇宙の始まりと終わりを表す言葉とされた。
今日でひとくぎり
Rubotyプラグインを1ヶ月かけて0b00011111個つくった。バイナリ的にもぞろ目で切りがいいので、毎日作るのはこれで最後にする。明日になればまた書いているかもしれないけど。
次は0b0111日で0b0001個gemをつくるチャレンジしようかな。
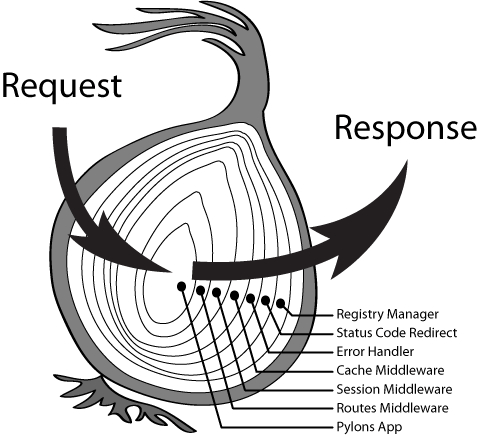
Rubotyを書いていて、wsgiのタマネギ画像みたいなbotフレームワークが欲しくなったので、またbotを書くかもしれない。